Try This MeetingSift Functionality:
HOW TO:
Capture Meeting Minutes & Task Assignments in MeetingSift
STEP 1: Invite meeting minutes takers
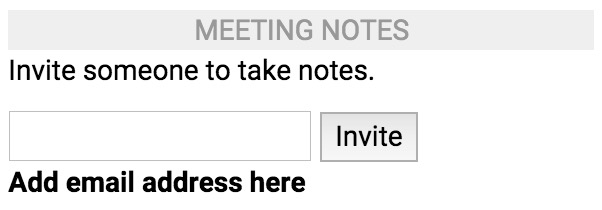
When logged in to MeetingSift as a Meeting Leader, click on the “Run Meeting” tab of your meeting and find the “Meeting Minutes” section in the bottom right corner of the screen. Enter the email address of the person you want to invite to take meeting minutes, and click the Invite button. You can invite multiple people to take minutes at the same meeting.
STEP 2: Open meeting minutes & task assignments page
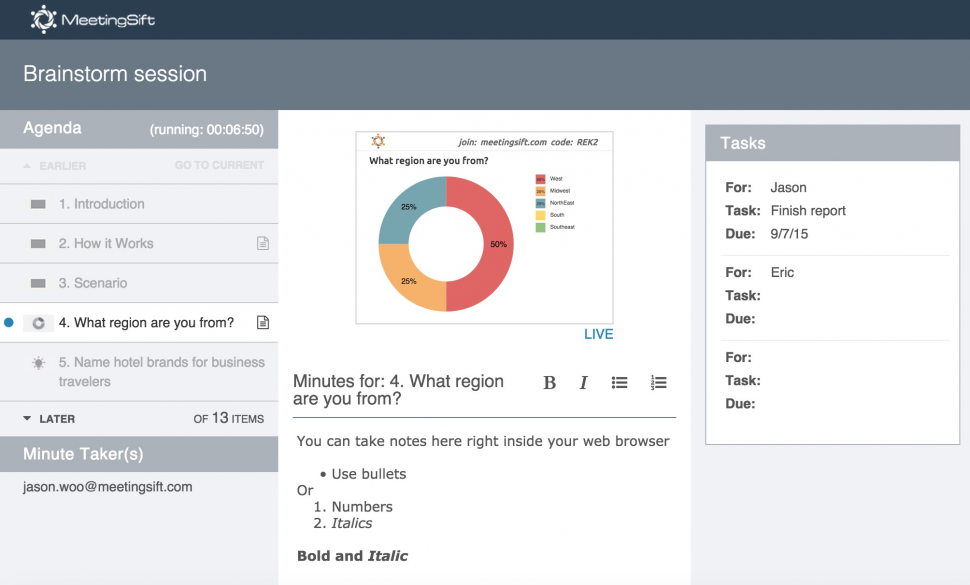
The minutes taker will receive an email with a link to Meeting Minutes and Task Assignment page. This page has the Meetings Agenda, list of invited Minute Takers, a live view of the Meeting Output, a text area for typing in minutes, and a Task Assignment list.
STEP 3: Type in meeting minutes & add assigned tasks
The minutes taker can type in their minutes into the text area below the meeting output view. Notes are taken with each individual agenda item for better organization. The Minute Taker can navigate to any agenda item and add text, they can also see the current agenda item as indicated by the blue dot. Once notes are added to an agenda item, a note icon will appear next to the item title on the agenda list. Assign Tasks and dates to specific people, simply enter the person, task and date in the “For”, “Task” and “Date” fields.
Meeting Minutes and Tasks are auto-saved, so no need to save just close. Meeting minutes and Tasks automatically become part of the meeting report. The meeting notes are available in both the meeting leader and participant report. Meeting minutes can also be added after the meeting has ended to allow for further editing.

